Showing posts with label DIY Projects. Show all posts

Thursday, September 4, 2014

Carrot Stamped Tee

I decided to take the morning off since the last couple of days have been just so crazy! It was so much fun to put together a DIY, I have been needing sweet outfits for the beach this weekend, and I think this shirt ended up being perfect. The thought of using grated carrots to stamp and make a print just randomly came into my head this morning as I was making my oatmeal and looking in the fridge for some milk. I saw my little container of carrots and it just hit me that it would work perfectly for a stamp! I had an old white t-shirt that I've been throwing around ideas for, and this finally sounded perfect. After I cut the carrot in half, I  grated it to make it more of a rough, wood look. I used a new half of a carrot for each row just to give it some variety. It didn't take too long, and was super, super easy. Im so excited to take this to Hilton Head this weekend! If you have a neutral tee, be sure to give this a try!
All you need are carrot sticks, a cheese grater, some fabric paint, and a neutral tee!

Wednesday, February 5, 2014

Found. . .

Found.
Discoveries and adventures have been a huge part of my life for the past year. One of which has been road side furniture. It always amazes me what I can find if I keep my eyes open. People abandon some of the coolest things on the side of the road, it is so amazing to find a treasure that was originally abandoned. I have a lady about 10 minutes from my house that has "given" me quite a bit. She had thrown out the shelf and table pictured in this blog post. She also put out a chair that is now newly painted and reupholstered in my bedroom! I mean, how cool is that. It is so fun to transform furniture. Here are a couple of my findings and some stories from this past year. 
Today, I actually came across this SUPER amazing shelf on the side of the road. It hasn't been painted yet, and I feel like it is a brand new canvas for me to work on. I need to run to Lowes to see what color might work best. I'm thinking something happy, like a mustard yellow or red might be sweet. I can't wait to work on it! The only flaw is a tiny crack in one of the shelves. But hey, since when can't wood glue fix that?! Such a find. It is perfect for hanging up headbands that need to be cut and sewn! Psst- those headbands are hitting the Etsy shop on March 1! I am just way too excited. So are Shelby and Cinnamon, can't you tell?!
This chair was actually something I picked up at Miracle Hill for $10. I fell in love with the detailing on the chair back. It used to be just a solid wood color, but I wanted to make it fun for my studio. So! I went to Lowes and got some teal paint (it is a super happy bright color!!!!). I think it turned out lovely. It is one of my most favorite pieces!
This was the table I found on the side of the road outside of a lady's house. She is constantly putting out amazing stuff, I couldn't believe I found this! I had to wait until I was off of school, but I finally went and got it with my grandpa's truck! It was such an adventure trying to get it home, I was so thankful I had the truck. It really was a mess when I first got it. The paint was awful. Like, really bad. So I used paint stripper to get all of the old paint off! 7 hours later, I was sanding it and pulling off the old wood on the top. It had several layers and was so difficult to peel off! My brother ended up helping me pry it all off since I wasn't as strong. The next day, I took wood glue and glued down this pretty rose plywood on top. Then, I got to sit down and repaint the legs and base of the table. It was most definitely a weekend project. It took a LOT of sanding, patience, and painting. Once it was finally done, I realized that it was so worth the wait. I finally had somewhere to work on and paint on in my little craft studio! It was beyond perfect. Plus, are you not obsessed with that metal siding?! It's my favorite part about the table, it is so unique!
This guy was found at a garage sale I passed on a backroad one afternoon. I was almost didn't get out and look, but then I spotted this. It looked almost brand new. So, I couldn't resist! The lady wanted $10 for it. It was in amazing condition, and I couldn't pass it up because I needed storage for all of my fabrics and supplies. I still am not sure as to how I got this home, but somehow I stuffed it into my truck. My little Honda Accord can do anything! It turned out to be a life saver for me. Organization is MUCH needed in my life, so, this helps me on a daily basis. And get this, I never had to paint this guy. He was already perfect. The only thing I did was completely washed, wiped, and cleaned it all off, put in paper and modge podged it to the bottom to create cute drawer liners, and got some eclectic knobs at Hobby Lobby. 
Hope this has inspired you to go make something found into something beautiful. Keep your eyes open, always be ready to find amazing treasures. Happy Wednesday!


Saturday, August 31, 2013

$1 Little Aztec Rug. . .

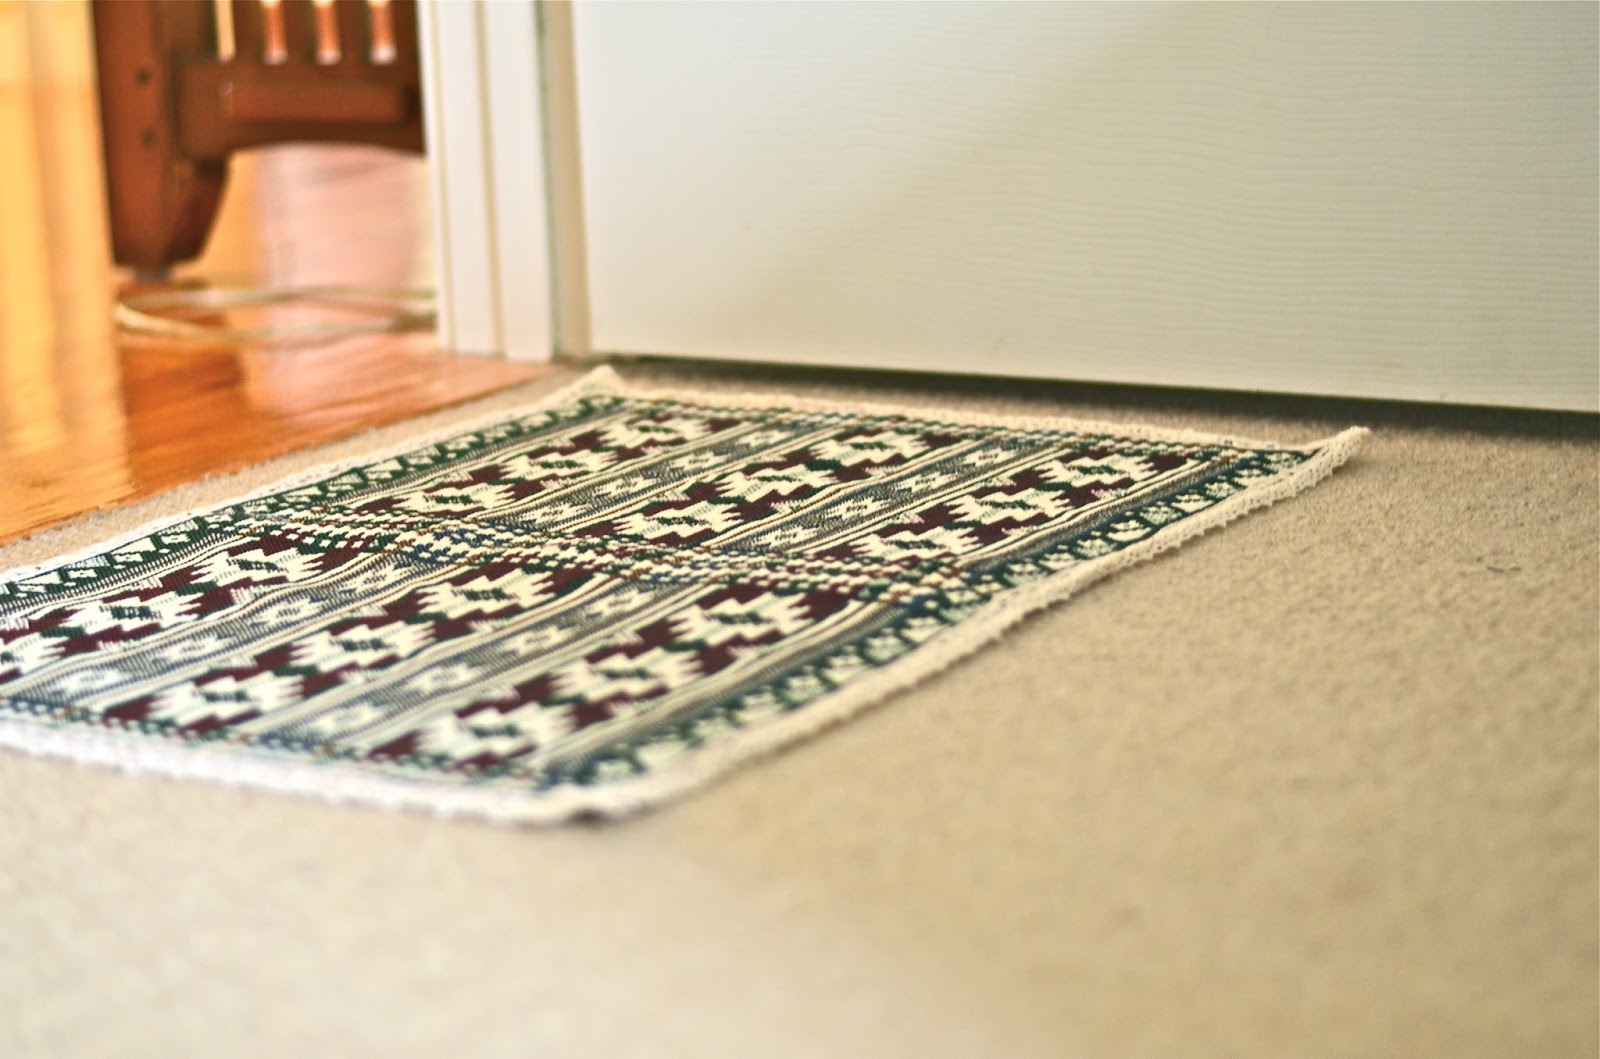
Ever just wanted a super simple project that could be the inspiring piece for an entire room? I found just that last week at Miracle Hill. I just started a new semester of college (which is why my blogging has slacked a little ;) ) But I went into the thrift store to try and find a Spanish dictionary for my Spanish class because I know that the thrift store always has stuff like that. Sure enough, I found my dictionary. Right as I was turning around to check out, this super amazing Aztec pattern stuck out to me in the linen section. I picked it up and realized that it was 2 place mats. 50cents a piece. I was going to use them to make a little monster for my farm fair. That was the original plan. But then once I got home, I threw my stuff onto the floor and realized how much I LOVED the place mat on the floor. Maybe even as a rug?! And that is the little story about how this project began. I repurposed some lace trim that I found at Goodwill, and sewed it onto the sides of the rug after I fused the rug together in the center with stitches. It took me 20 minutes to make, and I fell in love. I am planning on decorating my room for fall/winter around this piece. I love being inspired even in the simplest of ways. I would love to see how other place mats would turn out, let me know your success stories if you decide to try this! All I know is I was absolutely smitten.

Saturday, July 20, 2013

Little Greens. . .

I've been dying to share some new little additions to my room with you like, all week. Just got to getting the pictures up, so hope you enjoy a little sneak peek! About 2 weeks ago, I decided to go get some cute little succulents from Lowes. There were SO many to choose from, I had no idea how unique they were!!!!! Love what I found, I was so giddy. Once I got home I planted them into this little clay bowl that I had found at Goodwill for $2. And wallah! Here is what it turned out like! Honestly, I'd have to say, the tiny red cactus is my absolute favorite. If I had to pick favorites.
Another project I started actually came from the thrift store too!!!!! I got this super awesome bottle at the Fashion Shack. I immediately was inspired. When I looked at it, I thought back to the older days before telephones and mail. The kind of days where sweethearts mailed letters in bottles. Hoping that they would make it to the seashore. Jason from time to time will write me a really sweet letter. I don't get them often, but the 3 that he has given me over the almost 9 months we have been dating have been so precious to me. They each have a story behind how he gave them to me, and it just melts my heart to think about them! I wanted a constant reminder of these sweet notes. Filled with gracious, loving words from the man that I am absolutely head over heels for. And this is what I came up with to display them. They are displayed on my dresser right next to my bed, so every morning when I wake up, I am reminded of his love for me and how much he constantly sacrifices and gives to me. And I am also reminded of my Father's love. The kind of love that is even more perfect than Jason's. I can see those letter and rejoice in my Father who DELIGHTS to give good gifts. And I fall so much more in love with my Savior each and every day. Thanking God for His grace in my life, I don't deserve it.
So if you find an old bottle laying around, maybe roll up a few letters, or sweet objects that remind you to love. To live simply full of gracious words. Hope you enjoyed my new little greens. Happy Weekend Everybody!!!!


Thursday, July 18, 2013

Vintage Head Ties. . .

. . . Check out the latest from Simply Smitten! With working at a waterpark as a lifeguard, I was so tired of having my hair look so gross and boring. I love to add personality even when I am wearing my uniform, so I came up with some head ties to fix that!! Here are a couple shots from a shoot that I had with my cousin, Anna. She modeled them perfectly, I was so excited about displaying them in my Etsy shop. Go check them out at www.etsy.com/shop/aSimplySmittenlife! These are a MUST HAVE for your everyday life. They are just $5, how can you not get one?? I am just a tiny bit excited if you can't tell. These will also be in my booth in September at the Farm at Rabon Creek! Mark your calandars for September 21, it will be here before you know it! Just some thoughts for Thursday, hope you have a happy start to the weekend!


Wednesday, June 26, 2013

DIY Ombre Spoons. . .

This past week I had the opportunity to help a single mom who just graduated from Renewal. She had a new home and had absolutely nothing to put into it. I know how important my home is to me, and I wanted to make sure she had some special loves to put into it. So, here is a simple DIY that you can make for yourself, a housewarming gift, or a wedding present! It is less than $2 to make, and you will be sure to fall in love.

All you need is some wooden spoons ($1.25 from Big Lots, or use your own thrifted spoons), 4 colors of your choice of paint (29cents per bottle at A.C. Moore), and I love to use Frog Tape as my painters tape around the spoon.
Place the frog tape wherever you desire, it will give you a clean line. Paint the bottom half of the spoon, and after a couple minutes, take off the tape. You can them paint a band of gold above the color as shown below. After the paint dried, I used some water based polycrylic paint to paint a clear sealant on top of the paint.
And here they are. What beauties! I loved the simplicity and amazing result of this project. I finished in less than an hour, it was a super quick and easy gift idea. Hope this inspires you to greatness! Go make something wonderful.   xoxo- Meg

Thursday, June 20, 2013

Hand Stamped Thank You's DIY. . .


Today's "thoughtful Thursday" includes a special DIY. I was so so blessed to have had such a wonderful birthday (posting pictures soon, I promise!), and I just had to write some thank you notes. I didn't really feel like using my normal stationary, so, I came up with some handmade ones on my own!!!! It was super easy and took me less than three minutes to make the card! Here is the supplies of what you will need. . .
Stamp Set ($3 at Hobby Lobby if you use their everyday 
     40% off coupon)
Black Stamp Ink ($2 at Hobby Lobby)
Scrap Patterned Paper cut into desired sizes and shapes
Brown Cardstock Paper strips for the label
Colored Washi Tape
Pinking Shears (if you want to make the edges of your 
     tape zig-zag)

1. Cut the Patterned Paper into a card size (4x6)
2. Take your strip of brown cardstock paper, and tape it with the washi tape of your choice.
3. Stamp "Thanks" with the little block stamps, and then let dry for 1 minute.
4. Write a note of thanks to that someone who just took the time to make your day extra special. 

See how easy that was?!? I don't think I'll buy any stationary for a while. With these heart-felt thank you notes, you will be sure to make someone's day 100% better. Think about someone who you need to thank, and just write them a note. You never know how much it will mean to them. Happy Thoughtful Thursday!


Thursday, May 23, 2013

Embroidery Hoop love. . .

 Here is what has been my project that I have been working on for the last couple of days. Because the pillows were such a huge seller, I thought that this little felt flower clearly had you Simply Smitten ;) I decided to put one on burlap in an embroidery hoop. Priscilla was the woman who inspired me to do these, so each hoop size will be named after each of her girls. this small 4" is called the Addisyn Embroidery after my dear sweet Addisyn Hope. The next two sizes will be the Ava Embroidery (6") and the Emery Embroidery (8"). The story began with the makings of my first flower pillows. The original ones were made out of some scrap fabric that I got for almost nothing. Priscilla asked me to make some pillows for the girl's rooms, and I was more than happy to experiment and let her have the result of whatever I came up with. I was just excited to make something out of nothing and repurpose some fabric. Well, this was a lesson I learned the hard way. Thankfully before I started selling them! But the fabric wasn't as good of quality as I had thought, and after a couple pillow fights, the seams of the pillows had some holes. Now I know the importance of buying good fabric and making home decor that will last a life time. But anyways, I was discouraged and obviously felt bad that the seam tore so easily. But then Priscilla gave me an idea that won my heart. Take the old and turn it into a wall decoration through an embroidery hoop. Even though this is one of my "trial and error" moments in crafting, the turn around was amazing. Not only did she inspire me to make embroidery hoops, but she also showed me that I could use these felt flowers in a variety of ways. So no worries my sweet girls, the pillow fights might be over, but your bedroom walls will look just darling. Always so thankful for Emery, Ava, and Addisyn.
{Here is little Addisyn Hope and I. Her smile melts my heart every time. Seriously love the cheesin's I get from my sweet girls that I babysit, they are so precious. She and her sisters inspire me every time I see them, so thankful for the time that I get with them. They grow up so fast . . .}
Let me tell you. I am in love. I have already started making ones to go in my bedroom, I hope you enjoy them as much as I have enjoyed making them! Go check them out for SURE in my etsy shop at www.etsy.com/shop/aSimplySmittenlife. And as always, feel free to comment and let me know what you are thinking!!!! Want to know why I have had such a huge urge to craft lately? Be sure to read tomorrow's post for the "as of late" for my life. Happy Weekend!


Saturday, March 2, 2013

Handprinted Kitchen Towels. . .

This was my DIY project for this weekend, and it was SO much fun. Jason's mom's birthday is on Monday, so I was trying to think of something I could make for her that she could use everyday. One thought led to the next, I wanted to try hand stamping my own fabric, she likes to cook, and then it came to me, kitchen towels!!!!! So here they are. I fell in love. Be sure to check them out in my Etsy shop (www.etsy.com/shop/aSimplySmittenlife), they are only $5! What a deal, go get one. And be inspired. Happy Weekend! xoxo


Wednesday, February 20, 2013

Sharing the Love. . . One week later!

Since the schedule has been totally packed the past few days, I just HAD to share a post about Valentine's Day. It was incredible, I had the best day EVER. Jason made it so special, I loved every part of it! Here are his gifts that I wrapped, I just hand painted some designs on them.

And, of course I did a smitten one ;)
This is a sign I made for my bedroom door, I LOVE how it turned out, can't help but love little festive decor.
And, one more DIY, a Valentine's Banner! I just took an exacto knife and cut out fun Valentines, I ended up hanging this in our house for Valentine's Day. Sorry this post was so belated, but I hope you had the most amazing day ever. Happy Valentines Day (just a couple days later)! xoxo Enjoy the rest of February. . .